Setup Publicize to post to Social Media for you
Blogging regularly and consistently is the key to building good SEO (search engine optimization), but another important part is generating social media buzz about your posts. You do this by linking to Facebook, Twitter, Google plus, and having people click through to your site. Even tumblr, Pinterest, & Linked In are all great marketing tools and ways to drive traffic to your site. But how do you manage all of these identities and profiles? And the fact that more networks, more options, just more! are being added everyday. Well, you let WordPress do it for you!
Last month, we talked about scheduling out your WordPress posts, now we will follow that same thinking and use the Publicize feature within the Jetpack plugin to connect your social media networks of choice and have them auto post a link to your account at the same time as your blog post goes live.
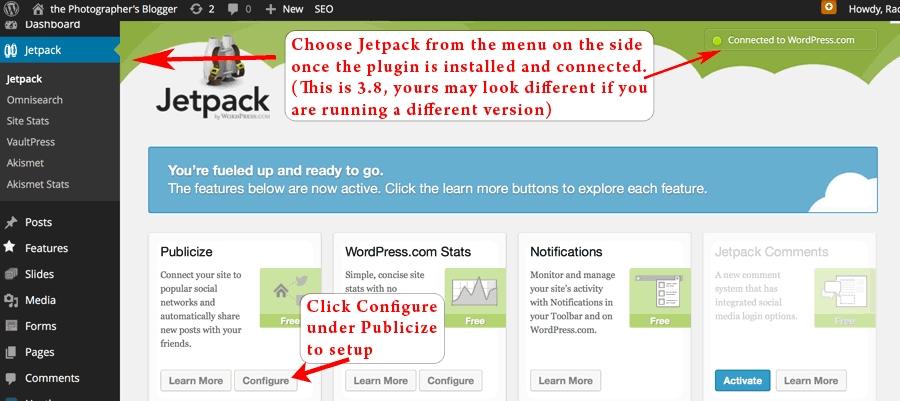
Jetpack comes built-in with most new installations of WordPress because it was created by automattic, the for-profit wing of the WordPress community. It allows users to use some of the most loved features of wordpress.com on their own self hosted sites using WordPress.org. (The difference between wordpress.com and wordpress.org are a whole different blog post!) I used to just uninstall Jetpack, because well – damn the man! But then I started following wordpress.com more closely and the man really wants to make WordPress better, for everyone, for free! (within reason). So Jetpack has some good features, and the best one to install first is Publicize.
At it’s core, Publicize allows you to connect your Facebook, Twitter, Linked In, Tumblr, Path, and Google + to your WordPress site. I know it’s missing some key networks that you may use, and it has some that you haven’t heard of & that’s ok! It’s a great place to start. Publicize also allows you to configure a share this button to appear at the bottom of your post.
Setup Publicize Tutorial
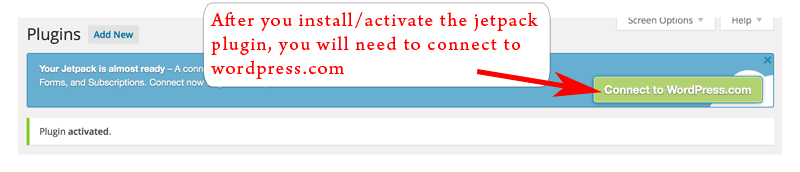
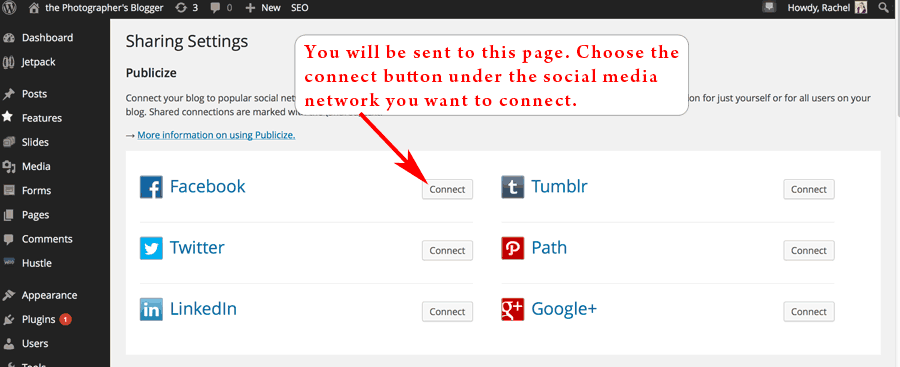
For this tutorial, I’ll show you how to setup Publicize by connecting your Facebook account to your blog.The first step is to install Jetpack if you don’t already have it or you have deleted it. If you have it installed, all you have to do is activate it in your plugins directory.
*A note about wordpress.com accounts – you probably already have one. Do you have Akismet setup & running? Then you definitely have one. But, if you need to sign up for an account, you can sign up for one without creating a new blog on their site (because that gets really confusing), sign up for just a username.
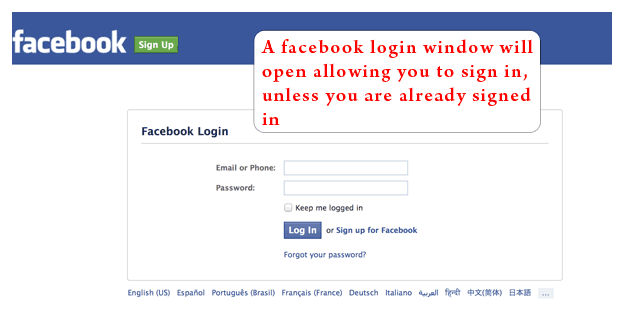
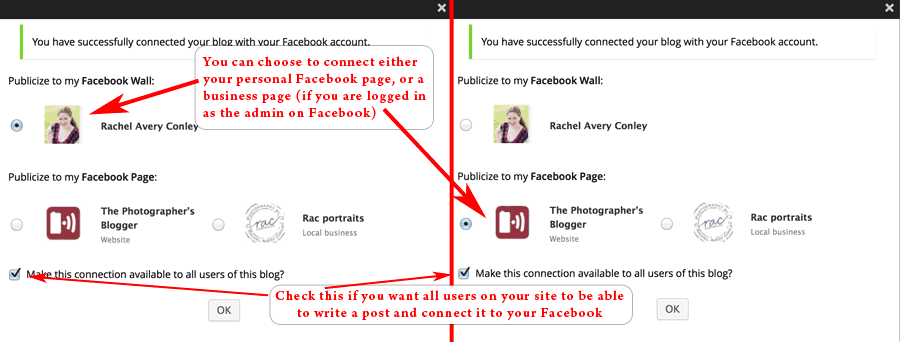
Facebook will go through a bunch of prompts asking if you want to allow WordPress to post and do things for you. You want to say yes, you are allowing your blog to post for you. (It’s better than allowing a third-party application. :-)) Once you have gone through all the prompts and connected successfully, you will see this pop-up below back in your WordPress dashboard.
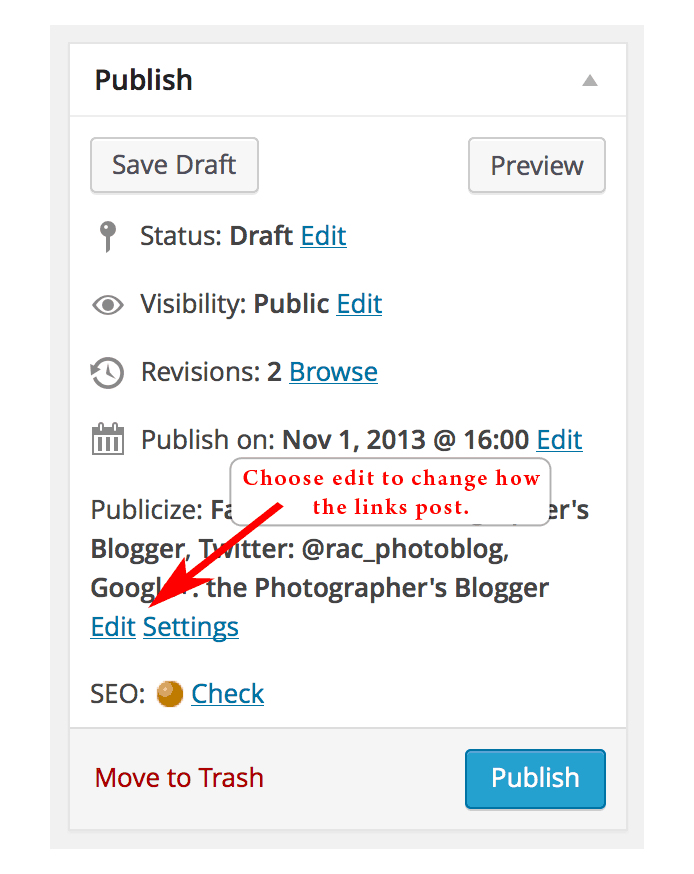
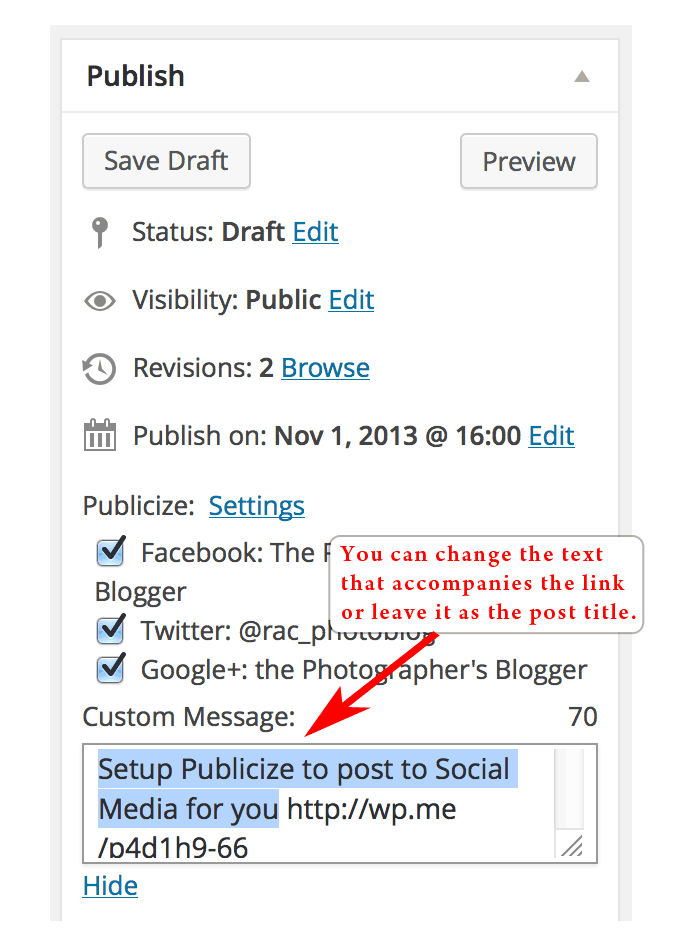
Once you are connected, you can write your post. Under the Publish panel, you will find the option to change how the links look and what they say when they post for you.

I hope this help you to get started. Once you schedule your posts to publish at a future date in WordPress, and then have Publicize create an auto post for you in some of the major social networks, you are well one your way to creating a power marketing platform to showcase your brand!